


How to Install XAMPP on Windows
Learn How to Install XAMPP on Windows 11 Step-by-Step Guide:
Introduction:
An open-source software program called XAMPP gives developers access to a local web server environment. It consists of the tools required to create and test online applications, which are the MariaDB database, the Apache online Server, and the Scripting Language. This article will walk you through the XAMPP installation procedure on Windows step-by-step and provide great questions and answers to help you work through typical problems.
Step 1: Download XAMPP:
- Go to the official XAMPP website: https://www.apachefriends.org/download.html
- Choose the version of XAMPP that corresponds to your Windows version (e.g., XAMPP for Windows 11).
- Click on the “Download” button. The download should begin automatically.
Step 2: Run the XAMPP Installer:

- Once the download is complete, navigate to your Downloads folder.
- Locate the downloaded XAMPP installer file (e.g., xampp-windows-x64-8.2.0-0-installer.exe).
- Double-click on the installer file to launch the installation wizard.
- Follow the on-screen instructions to complete the installation process.
- Choose the components you want to install (Apache, MySQL, etc.) and select the installation directory (e.g., C:\xampp).
- Click “Next” to proceed with the installation.
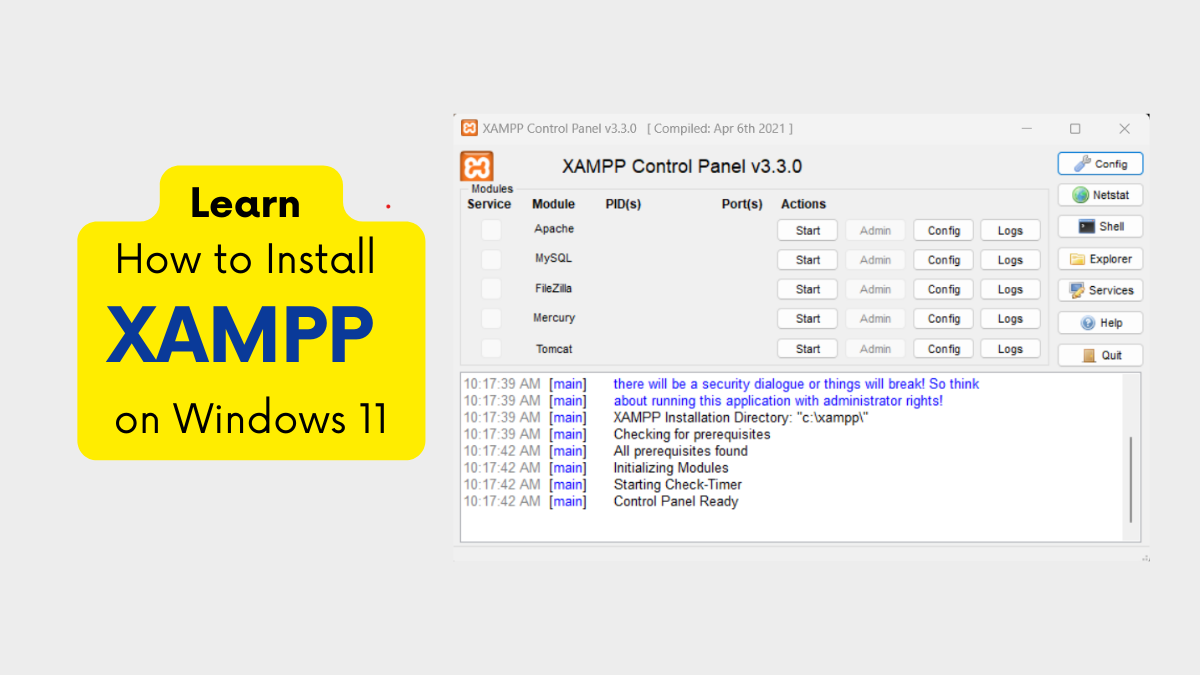
Step 3: Start XAMPP Control Panel:
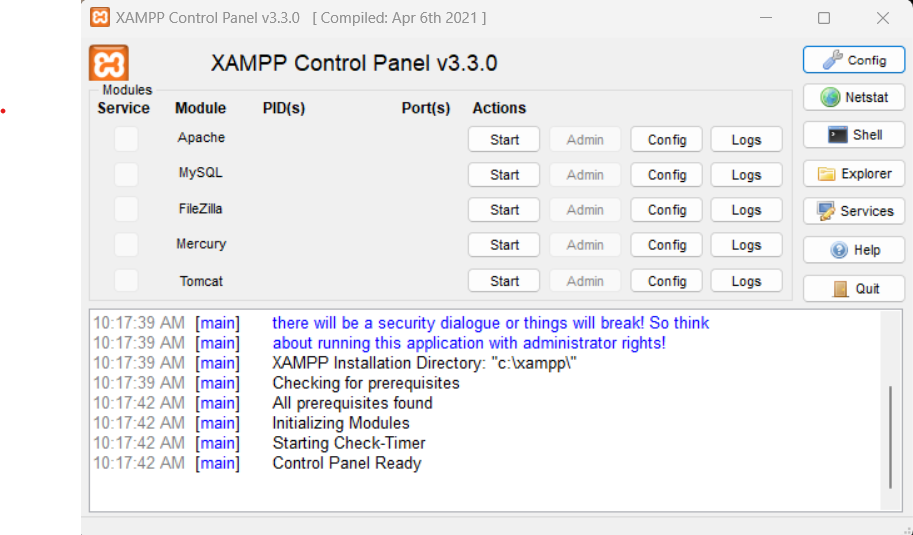
- After the installation is complete, open the XAMPP Control Panel. You can find it in the Start menu or by navigating to the installation directory (e.g., C:\xampp\xampp-control.exe).
- The XAMPP Control Panel will display the available modules and their status.
- To start a module, click the “Start” button next to its name. You can start Apache and MySQL to run the web server and database.
Step 4: Verify XAMPP Installation:
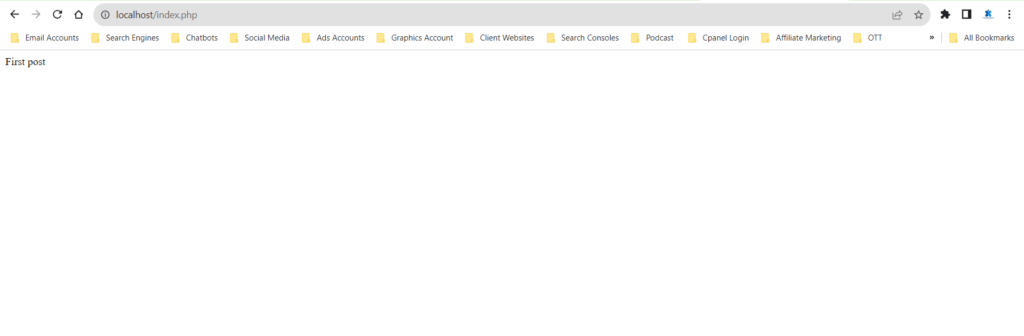
- Open your web browser and type “localhost” in the address bar.
- You should see the XAMPP welcome page, indicating that XAMPP is installed and running successfully.
Frequently Asked Questions(FAQs)
- What are the system requirements for XAMPP?
- XAMPP requires a Windows operating system (e.g., Windows 11, 10, 8.1, etc.) with a minimum of 2GB RAM and 500MB of free disk space.
- Do I need to disable antivirus software before installing XAMPP?
- Some antivirus software may interfere with XAMPP installation. Disabling it temporarily during the installation process is recommended but not always necessary.
- What are the default ports used by XAMPP?
- Apache uses port 80 by default for HTTP and port 443 for HTTPS. MySQL uses port 3306 by default.
- How can I configure XAMPP modules?
- You can configure XAMPP modules through the XAMPP Control Panel or by editing the configuration files directly. For more information, refer to the official XAMPP documentation.
- How can I uninstall XAMPP?
- You can uninstall XAMPP through the Control Panel in Windows. Alternatively, you can manually delete the XAMPP installation directory.
Conclusion:
Installing XAMPP on Windows is a straightforward process. By following the steps outlined in this guide, you can set up your local web server environment quickly and easily. With XAMPP, you can start developing and testing your web applications without needing an internet connection. Remember to refer to the FAQs section if you encounter any issues during the installation process.
Additional Resources: (How to Install XAMPP on Windows 11)
- XAMPP official website: https://www.apachefriends.org/download.html
- XAMPP documentation: https://www.apachefriends.org/docs/
- XAMPP tutorials: https://m.youtube.com/watch?v=btauAEqaifw